What was a Trebuchet?
The catapult was invented during the time of the Romans and the Ballista was invented by the Greeks. After the fall of Rome the French were some of the strongest fighters. But, this is the time of the castle. In order to defeat an army that is behind 20 foot high, 6 foot thick stone walls, the approaching army needed some means of attacking the safe populace. The old catapult and ballista wasn't strong enough to propel things the distance and weight required. Thus the invention of the Trebuchet. Armies would surround a castle, cutting off supply routes, and use the trebuchet to throw diseased animals, burning rubbish, rocks, and eventually explosives, over the walls. The process was called a siege (attaching a castle) and the trebuchet was considered one of the most effective siege engines before the invention of the cannon/gun.
How did a Trebuchet work?
Really it all comes down to Terrestrial gravitation. A catapult worked by winding a chord or part of the machine to build force. The trebuchet generally was weighted on one end. The 'bucket' end was hooked in place to be filled. Then the soldier would release the hook and the weight would fling the arm upright. Then it was up to the momentum and gravity that would carry the material to its destination. This was way more effective than the catapult. The catapult distance and height (trajectory) was really based on how many turns soldiers could make in the chord. The more twisted the chord the more 'umph' behind the projectile. Therefore they were limited by the strength of their men, and it would take time to twist the chord and load the projectile. The trebuchet could project up to 300lb stones! Which was 5 or 6 times that of the strongest catapult. It only took a stone of about 50 or 60 lbs to damage the strongest stone wall of a castle or tower. The other difference from a catapult was the end design. A catapult had a hollow or cup shaped end, where soldiers would place the projectile in that hollow. A trebuchet had a sling, this upped the amount of momentum and centripetal force behind the projectile. Changing from a cup to a sling effectively doubled the power behind the projectile.
Building a Trebuchet:
Supplies -
* Glue (hot or wood, NOT superglue) * 1x3 inch rectangle of a plastic shopping bag.
* about 20 Popsicle sticks. * string
* Fishing weights. * fishing wire
* Small bounce ball * power drill
* 1 finishing nail. * regular school glue
* 1 metal paper clip
Process -
1. Cut about 5 Popsicle sticks in half
2. Glue 2 Popsicle sticks, with one of the short sticks in the middle. This will become the throwing arm.Set aside to dry.

3. using 6 Popsicle sticks, make the base gluing 4 sticks into a square, then using 2 more to reinforce 2 sides.
4. Make the arms. Glue 2 Popsicle sticks together. Set aside to dry.
5. Finish the throwing arms, inset a Popsicle stick into the open end of the arm. Changing the length will Change the distance. A great side project is to determine the exact length that will produce the maximum throwing distance for the projectile you want to throw.

6. Arm Cross Beams. This is one of the trickiest and yet most important parts of the Trebuchet. Don't be stingy on the glue, make sure they are VERY strong to prevent breakage. Using 2 of the 1/2 pieces glue one so it will be parallel to the table when upright, the other is a support beam.Set aside (w/ something under the cross beam) to dry completely.


8. Arm structural supports. Using 2 1/2 Popsicle sticks, angle them at the base of the arms, gluing them to the base. You want these bases of the arms to be strong to deal with the vibration and force of each throw.

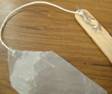
9. Cut the ends of the plastic rectangle to diamond points.
10. Cut one sting to be 3 inches, cut another one to be about 31/2 inches. Tie a mini circle in the end of the longer string.
11. Glue the ends of the strings onto the pointed ends of the plastic to make basket.
12. Straighten the paperclip, then bend it into a J
13. Glue the paper clip so the top of the J sticks off the end of the throwing arm just a little bit (about 1/4 inch) Also glue the non-knotted basket string to the throwing arm. (When loading the Trebuchet to throw, you slip the circle knot over the end of the paper clip.)
15. Insert the nail through the 3/4" hole (the hole closer to the middle of the arm)
16. Using PLENTY of glue, glue the ends of the nail to the cross beams. This is is the most vulnerable part of the Trebuchet.

17. Using fishing wire, feed the wire through the open hole on the end of the throwing arm. Slip fishing weights onto the string and tie. You could glue the ends of the wire to the throwing arm, but I like to keep them free so we can experiment with the weights, adding more.

18. Wait until all the glue is totally dry before using!!
To use your trebuchet, hold the arm to the 'basket' is on the table. Load paper balls, bouncy balls, whatever, into the basket. Slip the circle knot over the end of the paper clip. Do a countdown then let the arm go!
Experiment with the counter weight, and see if you can make your Trebuchet throw things higher, or longer, or heavier!


