I absolutely LOVE this blog - written by a mom who started her own school, she believes kids should be allowed the freedom to be creative! I remember being a kid with a gigantic washing machine box and being content to play for days in the thing. Well this blog is along those lines - giving ideas on getting the kids creative with stuff you have around - like making robots out of the stuff in your junk drawer!
http://kidswhothink.blogspot.com/
Showing posts with label crafts. Show all posts
Showing posts with label crafts. Show all posts
Saturday, October 22, 2011
Friday, March 4, 2011
Mummies, Mummies, everywhere!
I have found some great projects for Xman's Egypt presentation. One of the ones we are doing today? Making mummies. We bought some WWF guys (they were bigger than GI Joe) and we'll be using an apple. Since we can't dessicated (dry out) our toys, we will simulate that step - but to get the point across of what this step did to human bodies we'll be doing it with an apple slice.
First the kids used this Interactive Website - How Mummies are Made
Apple Slice Dessication -

Steps to Making a Mummy -
Step 2 - we pretended to remove the organs
Step 3 - we covered our 'body' for 40 minutes (1 minute = 1 Egyptian day)
Step 7 - we had to simulate since our dolls didn't have fingers and toes.
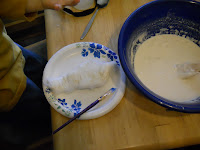
Step 9 - We sealed our linen with a home made version of Plaster of Paris - 1 cup warm water and 2 cups flour (we made sure our mixture was a bit more watery than regular glue so our cheese cloth strips could be hardened.)


First the kids used this Interactive Website - How Mummies are Made
Apple Slice Dessication -
- Cut an apple into quarters.
- In a measuring cup, measure 1/3 cup of baking soda, fill the cup the rest of the way with table salt.
- Mix the dry ingredients - this is very similar to Natron, the compound used by the Egyptians.
- Place one apple quarter in a jar or cup
- Fill the cup with the salt mixture, making sure the apple is covered completely.
- In another cup place another quarter of the apple - leave it uncovered (this will show the comparison in decomposition)
- Place both cups in an out of the way place for about a week.

- Delivery of the corpse for mummification
- Removing the Organs. The heart remains in the mummy, the brain is destroyed and removed through a nostril, the stomach, liver, lungs and intestines were washed and placed in Natron for dessication - these preserved organs were each placed in a special jar called a Canopic Jar which is sealed with a carved top representing which organ was inside.
- The body was covered in Natron for 40 days to remove all water.
- The body was then washed and anointed with oils while the Priests chanted and sang blessings.
- The body was stuffed with herbs, spices, linen, sawdust and salt - this helps the body have normal proportions instead of just looking like a shrunken raisin.
- The head and neck were wrapped in linen
- The fingers and toes were wrapped in linen
- The rest of the body was wrapped in linen (all of these wrappings also included little amulets being wrapped as well.)
- The linen was sealed with a resin (like tree sap)
- The face of the mummy was painted with gold to represent the kings face
- The mummy was then placed in 3 coffins which (after the funeral) were then lowered into the sarcophagus.
Step 2 - we pretended to remove the organs
Step 3 - we covered our 'body' for 40 minutes (1 minute = 1 Egyptian day)
Step 7 - we had to simulate since our dolls didn't have fingers and toes.
Step 9 - We sealed our linen with a home made version of Plaster of Paris - 1 cup warm water and 2 cups flour (we made sure our mixture was a bit more watery than regular glue so our cheese cloth strips could be hardened.)


Friday, January 7, 2011
Weather Blues Box
What do you do on Snow Days? The local schools are letting out early, so my BFF called to see if I wanted to get out kids together...and I explained that we don't usually take snow days!
Sometimes, if it's been bad weather for several days in a row - preventing the kids from burning off energy outside (as my oldest is a severe asthmatic) I'll put together fun weather related projects. In fact I have a small plastic bin (about the size of a shoe box) that I keep my fun weather junk in..lol...
Kit Supplies:
NOTE: I suggest a parent ALWAYS be present for experiments - you never know what can go wrong!!
Cloud in a Bottle:
a cloud is made out of 3 things in the atmosphere - water, dust particles and atmospheric changes.
all poor weather comes in the form of a weather front. Generally speaking one side of the front will have absolutely gorgeous weather and the other will have absolutely horrible weather. This occurs in a clear line of demarkation. High and low pressures do not mix - they may swirl around eachother (thus causing a tornado) but they don't mix.
Warm Front diagram - http://www.physicalgeography.net/fundamentals/7r.html
Cold Front diagram -http://www.kidsgeo.com/geography-for-kids/0128-cold-fronts.php
Once you have a clear understanding of how the cold air slides against the warm, you can get a better understanding of tornados. Essentially you have to have several phenomena to have a tornado - wind at 2 different atmospheric levels blowing at different speeds and in different directions (creating wind sheer). Extreme variations in temperature at 2 different atmospheric levels (the ground level is Very hot and humid, while up in the atmosphere is Very cold). The cold air goes to lower, the hot air attempts to rise and the wind creates a rotation - a tornado will usually only touch the ground if full of either rain or hail (making the spinning cloud heavy)
I did this one with my boys when they were young to understand where rain came from and the water cycle. Again an adult needs to be the one doing the experiment with the kids watching. The water cycle is so important to us - it is what allows for life!
The water cycle - http://www.kidzone.ws/WATER/
This is another really fun one - especially just before bed. Although I warn you it's a messy one! Essentially, this is demonstrating how our eyes interpret the color of the sky. The white light coming off of the sun enters out atmosphere where the particles break that light into all the colors of the rainbow. Blue being one of the most slow and is absorbed by gases in the atmosphere and radiates!
http://www.sciencemadesimple.com/sky_blue.html
Weather Sayings:
Sometimes, if it's been bad weather for several days in a row - preventing the kids from burning off energy outside (as my oldest is a severe asthmatic) I'll put together fun weather related projects. In fact I have a small plastic bin (about the size of a shoe box) that I keep my fun weather junk in..lol...
Kit Supplies:
- a couple of plastic 1 liter bottles (with tops)
- cotton balls
- cotton swabs
- safety goggles
- matches
- canning jars
- food coloring
- old DVD's
NOTE: I suggest a parent ALWAYS be present for experiments - you never know what can go wrong!!
Cloud in a Bottle:
a cloud is made out of 3 things in the atmosphere - water, dust particles and atmospheric changes.
- Rinse bottle thoroughly - do not use soap, and do not dry the inside of the bottle.
- Add a very small (like 1/8 teaspoon) of very warm water to your bottle.
- Put the cap on the bottle and shake well.
- Pour out excess water.
- Have adult light a match and carefully drop the lit match into the bottle. -- The smoke from the match adds the key ingredient DUST.
- Immediately replace the cap so none of the smoke is lost.
- Gentle shake the bottle back and forth 2-3 times- stirring up the second ingredient WATER
- Make sure the cap is very secure. Squeeze the middle of the bottle with both hands, then release your hands evenly & quickly - this is stirring up the final ingredient in cloud formation ATMOSPHERE CHANGES
- You should see the cloud form after 2 - 3 squeezes. It is better to do this in front of a dark background (like dark curtains) as the cloud will show up better. If you still cant see anything, then I suggest going back to the match step (as you probably let too much smoke escape before getting the cap on).
all poor weather comes in the form of a weather front. Generally speaking one side of the front will have absolutely gorgeous weather and the other will have absolutely horrible weather. This occurs in a clear line of demarkation. High and low pressures do not mix - they may swirl around eachother (thus causing a tornado) but they don't mix.
Warm Front diagram - http://www.physicalgeography.net/fundamentals/7r.html
Cold Front diagram -http://www.kidsgeo.com/geography-for-kids/0128-cold-fronts.php
- Fill 1 cup measuring cup with very warm tap water.
- Add a couple of drops of red food coloring. Make it so you can see the color but not so dark that it is almost black.
- Fill second measuring cup with very cool water from the tap.
- Add a couple of drops of blue food coloring.
- Gently stirr each mix to evenly spread the color.
- You need 2 jars with EXACTLY the same size neck. (If there are any cracks or crevices that don't line up you'll have a huge mess).
- Fill one jar to almost overflowing with the cold water, and the other to almost over-flowing with the hot. (be sure the glass isn't too hot to touch).
- Place an index card over the top of the top of the hot water jar. Push the edges down, cupping your hand around the neck.
- Carefully turn the jar over (with your hand still holding the top in place at the neck) - some water leakage is totally normal.
- Carefully stack the hot water jar over the cold. The paper acting as a boundery.
- Carefully pull the paper out from between the jars without sliding the jars.
- I like to use a little Scotch Clear tape around the joint of the jars. It won't stop all leakage but will help.
- Very Carefully, lift both jars, pressing them together at the neck. Turn the jars on the side and see what occurs!
Once you have a clear understanding of how the cold air slides against the warm, you can get a better understanding of tornados. Essentially you have to have several phenomena to have a tornado - wind at 2 different atmospheric levels blowing at different speeds and in different directions (creating wind sheer). Extreme variations in temperature at 2 different atmospheric levels (the ground level is Very hot and humid, while up in the atmosphere is Very cold). The cold air goes to lower, the hot air attempts to rise and the wind creates a rotation - a tornado will usually only touch the ground if full of either rain or hail (making the spinning cloud heavy)
- Take 2 2-liter soda bottle.
- Fill one bottle (about 3/4 full) with water and a few drops of food coloring. Add a small sprinkle of glittler.
- Place the empty bottle over the full one, so the neck of the bottles lines up.
- Use duct tape to secure the necks.
- Quickly turn the bottles over and give them a little twist. you should see the twister form.
I did this one with my boys when they were young to understand where rain came from and the water cycle. Again an adult needs to be the one doing the experiment with the kids watching. The water cycle is so important to us - it is what allows for life!
The water cycle - http://www.kidzone.ws/WATER/
- Much to my husbands confusion, I always keep a small hard cover book in the freezer just for this experiment. But if you don't want to do that, I suggest a minimum of 6 hours in the freezer - and it must be a hard cover.
- Boil water on the stove - you can see evaporation in motion with the steam!
- Very carefully hold the book at an angle in the steam - this will condense the water vapor back into droplets of water and it will look like the book is making rain!
This is another really fun one - especially just before bed. Although I warn you it's a messy one! Essentially, this is demonstrating how our eyes interpret the color of the sky. The white light coming off of the sun enters out atmosphere where the particles break that light into all the colors of the rainbow. Blue being one of the most slow and is absorbed by gases in the atmosphere and radiates!
http://www.sciencemadesimple.com/sky_blue.html
- Set a flashlight standing upright right in front of you, so the beam is clear and rises.
- Gently take a bag of flour (even better with a flour sifter) and gently allow the particles to blow through the beam - you should see flashes of colors/light!
Weather Sayings:
- Red sky at morning sailor take warning, red sky at night sailor's delight.
- Red sy at night shepherds delight. Red sky in morning shepherds take warning.
- Never cast a clout till May is out. (Captain Urchy)
- If cows are sitting down then rain is on the way.
- Gullywasher (a lot of rain by bcluv)
- When the stars begin to huddle the earth will soon be a puddle. (Insomniduck)
- Halo around the sun or moon rain or snow soon. (Insomniduck)
- A year of snow a year of plenty. (Insomniduck)
- Rainbow in the morning gives you fair warning. (Insomniduck)
- Clear moon, frost soon. (Insomniduck)
- Mares Tails and mackerel scales make tall ships take in their sails. (Insomnduck)
- It's raining cats and dogs.
- http://hobbyscience.com/weather.html
- http://familyfun.go.com/winter/winter-crafts/snowflake-crafts/let-it-snow-t-shirt-674877/ Let it snow tee shirts (my kids favorites!)
- Wind Socks Need: 1 6 oz. foam cup for each child, Sharpened pencil, crepe paper streamers ( 6 colors), glue, yarn. Directions: Use a sharp pencil and poke six holes in the bottom of the cup. Space holes evenly about 1/4" from the sides of the cup. Cut 6 18in crepe paper streamers for each child. Roll the end of the paper and stick in hole on cup. On inside of cup, add a drop of glue on the side of the cup and glue the paper to the side of the cup. Do all 6 and glue. Poke a hole on each side of the cup- this will be the handle part- add yarn to make the handle. Have the children decorate the outside of the cup with extra pieces of Crete paper. We took ours to the playground and hung then on the fence. Its was so colorful and pretty!
- http://www.first-school.ws/theme/climate.htm
- http://www.enchantedlearning.com/themes/weather.shtml
- http://www.dltk-kids.com/crafts/weather/index.htm
Monday, November 8, 2010
Creatiity
I have to say one of the most common things I hear from new or perspective HS mom's is, "But I'm not really creative!"I love setting a pile of junk on the floor in front of the kids and telling them to go to town creating whatever strikes their fancy. Here's a site that helps kids with creating automobiles!!
East Toy Car Making Crafts for Kids
East Toy Car Making Crafts for Kids
Subscribe to:
Posts (Atom)