Example of a simple motor - this helps the student see what will be going on inside their motor. Here's another example of explaining a toy electric car.
My DH had fun assembling our sample car with the kids - we actually had a wood kit car that we used for our sample but the class is making it the long way over several weeks -
Supplies -
Toy motor from Radio Shack (costs about $5)
Wood scraps - ~ 2" x 4" block of 1" thick pine (or whatever is cheapest) to be the base, 2 1/2" long square blocks of the same wood to be the axles and one 2" long one for the 'windshield' base. Small pieces of wood to make the seat so that the seat is raised a bit so it will fit over the motor bracket.
1 pkg small wood screws
1 pkg small brass nails
Wood Glue
Drill with 5mm drill bit
Metal bracket to hold the motor
8 Milk Caps
2 Large Rubber Bands - 4 smaller rubber bands
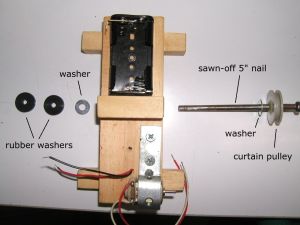
1 5" Nail
2 small rubber washers
2 metal small washers
4 tiny metal washers for the weels.
1 Curtain pully (from Home Depot costs about $.89)
AA Battery Holder (also from Radio Shack)
2 AA Batteries
Wood Paint
a couple of electrical wires
Procedure -
1. Assemble the frame of the 'car' - glue and either nail or screw on the axles, the windshield. Build the 'seat' but don't affix it to the frame as of yet.
2. Drill a 5 mm hole through the middle of the base cross wise, this will be for the drive train.
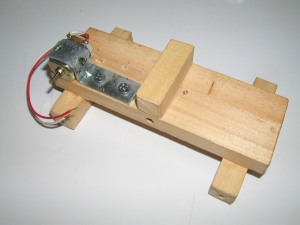
3. Paint the car and let completely dry.
4. Affix the motor, battery holder and wires to the base. (If you can, solder the the wires to the motor, otherwise you'll have to keep reattatching them)
5. Glue the curtain pulley to the 5" nail. Assemble the drive train like this:
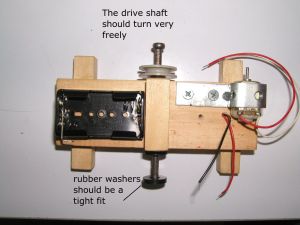
6. Glue 2 milk tops back 2 back you can use a small piece from a tire tube to be the rubber around the tire if you'd like.
7. Screw the wheels to the axles so that is goes wheel-washer-screw
8. 1 Small ruber band goes from the motor to the curtain pulley, a small rubber band then goes around the drive shaft to each wheel. Finally a large rubberband goes around the front and back wheels.
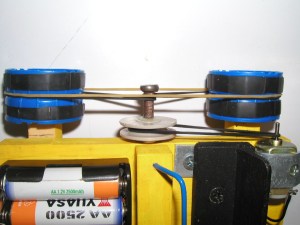
Final Product.
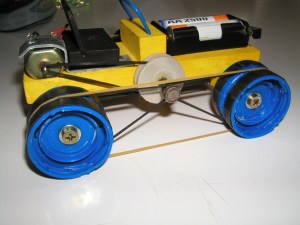
If it goes backward then you'll need to reverse the wires